 Download Image
Step-by-Step Guide to Drawing Iron Man
- Basic Outline:
- Sketch a simplified human figure in a heroic pose, standing upright with one hand on the hip (left hand) and the other slightly raised (right hand). Ensure the posture conveys confidence and strength.
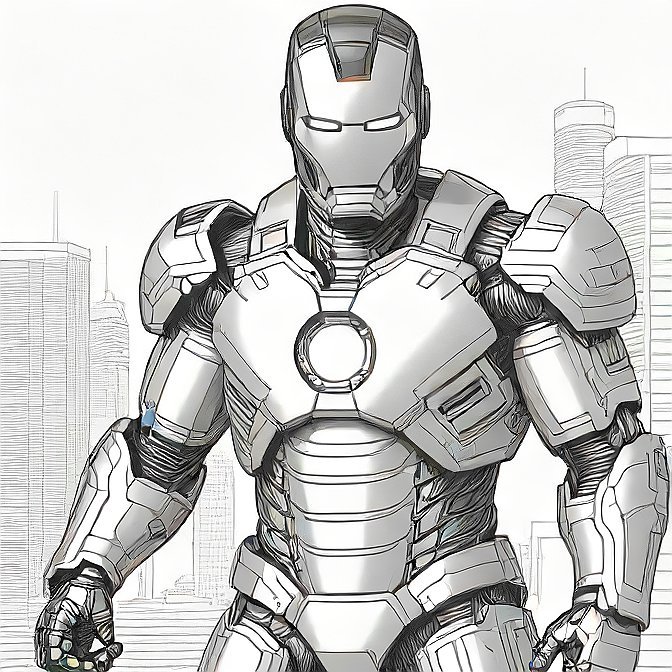
- Headpiece and Helmet:
- Draw Iron Man’s iconic helmet, focusing on the eye slits, central crease, and angular ridges along the top. Add subtle details like the mouth grill and side vents.
- Chest and Arc Reactor:
- Outline the large, segmented chest plate. Center the circular arc reactor, adding concentric circles and a hexagonal core. Shade around the reactor for depth (if shading is allowed).
- Torso and Armor Plates:
- Define the layered armor plates across the torso, including horizontal bands and vertical reinforcements. Add the waist belt with attached tools or compartments.
- Arms and Shoulders:
- Detail the segmented shoulder pads, elbow guards, and forearm armor. Ensure the gloves have finger armor and reinforced knuckles. Position the left hand on the hip, right hand open.
- Legs and Boots:
- Sketch bulky thigh armor, knee pads, and shin guards. The boots should be thick and armored, with textured soles.
- Refine Lines:
- Clean up initial sketches, erasing unnecessary guidelines. Reinforce key lines (e.g., armor seams, joint details) for clarity. Add cross-hatching or stippling for texture (optional).
- Background Cityscape:
- Lightly sketch a urban skyline behind Iron Man. Include varying building heights, windows, and antennas. Use parallel lines to create depth, making distant structures smaller.
- Final Touches:
- Darken critical details (arc reactor, eye slits, glove patterns). Ensure symmetry in armor panels. Add faint shading to buildings for dimensionality (if desired).
Pro Tip
Maintain a consistent line weight for boldness. Use reference images for accuracy on complex armor sections. This guide adapts to both hand-drawn and digital mediums! 🚀